Getting an electric car charger installed at home should be straightforward. You choose the right charger, a qualified installer checks your electrics, the unit goes on the wall, and you drive away from the experience knowing exactly how to charge.
That is the theory, anyway.
In practice, a proper electric car charger installation involves a few important checks behind the scenes. Your installer needs to assess the incoming supply, plan the cable route, confirm the charger suits your vehicle and tariff, complete the installation safely, and leave you confident using the app.
Here is what the process should look like from the first survey to the first satisfying “click” when your car starts charging.
Step 1: Tell us about your home, car and charging habits
The process starts with a conversation rather than a drill. We need to understand what you drive, where you park and how you expect to charge.
For a typical home EV charger installation, useful information includes:
- Your EV or plug-in hybrid model
- Whether you park on a driveway, in a garage or beside the house
- Where you would ideally like the charger mounted
- The approximate distance from the electricity meter or consumer unit
- Whether you have solar panels, a home battery or a heat pump
- Which energy tariff you use, or whether you are considering a smart tariff such as Octopus Energy
This helps us recommend the right charger instead of simply selling you the one currently sitting nearest to the van door.
Most domestic installations use a smart 7kW charger. That provides considerably faster charging than a standard three-pin socket and is usually well suited to overnight charging. However, the best charger for you depends on more than speed alone.
For example, an Ohme charger can be particularly attractive if you want smart tariff integration, while a Myenergi Zappi may be a strong choice if you have solar generation. Andersen, EO, Ratio and other manufacturers each have their own strengths.
You can see the charger brands and models we install on our EV charger installation service page.
Step 2: Complete the pre-installation survey
Before we provide a fixed price, we assess the proposed installation. This may involve photographs, measurements and a remote survey, followed by an in-person assessment if the property or cable route needs a closer look.
We normally need to see:
- The consumer unit or fuse board
- The electricity meter and incoming supply
- The proposed charger location
- The parking space and driveway
- The route between the consumer unit and charger
- Any obstacles such as outbuildings, garages, paving or garden walls
The aim is to identify the work required before installation day. Nobody enjoys discovering that the cable needs to take a scenic tour through the loft after the quote has been agreed.
We check the likely cable route, the distance involved, the type of wall or surface, and whether trunking, conduit or additional groundwork will be needed. We also consider practical details such as charger height, vehicle access, cable reach and protection from accidental damage.
For workplace projects, the survey is more detailed. We look at the number of parking bays, available electrical capacity, future expansion, user access and whether the business wants usage monitoring or pay-to-charge functionality. Our workplace EV charger installation service covers everything from initial design through to commissioning.

Step 3: Check the electrical supply and protection
A 7kW charger typically draws around 32 amps on a single-phase supply, so it needs its own dedicated circuit. We cannot simply connect it to the nearest convenient socket and hope for the best. Hope is not an electrical protection device.
During the electrical assessment, we check the following.
Consumer unit capacity
We look for a suitable spare way in the consumer unit and confirm that the board can accommodate the necessary protective equipment. Depending on the existing installation, this may involve fitting a dedicated circuit breaker, RCBO or an additional small consumer unit.
If the consumer unit is old, damaged or unsuitable, we will explain what needs to be upgraded and why. Any additional work should be clearly included in the fixed-price proposal.
Incoming supply and maximum demand
We consider the main fuse, the property’s existing electrical demand and other high-load appliances. Electric showers, induction hobs, heat pumps and storage heaters can all affect the available capacity.
Where appropriate, load management can help prevent the charger and other household appliances from drawing too much power at the same time. Some smart chargers can automatically reduce their output when the property is using more electricity elsewhere.
Earthing and bonding
The earthing arrangement needs to be suitable for EV charging. We check the supply type and confirm that the installation meets current safety requirements, including the appropriate protection for PME supplies where relevant.
We also check the main bonding arrangements. If gas or water bonding needs attention, we will explain the issue before proceeding rather than burying it under a neat piece of trunking.
Cable size and route
Cable size depends on the charger output, cable length, installation method and surrounding conditions. A longer route or external installation may require a different cable specification than a short internal run.
The cable may be clipped neatly to a wall, installed inside trunking, routed through a garage or loft, or protected across an outdoor section. The chosen method should be safe, durable and tidy.
Step 4: Choose the charger and smart features
Once the electrical requirements are clear, we can help you choose a charger that suits your routine.
A smart 7kW charger usually allows you to start and stop charging from an app, create schedules, monitor energy use and set charging preferences. These features are useful if you want to charge overnight or take advantage of time-of-use tariffs.
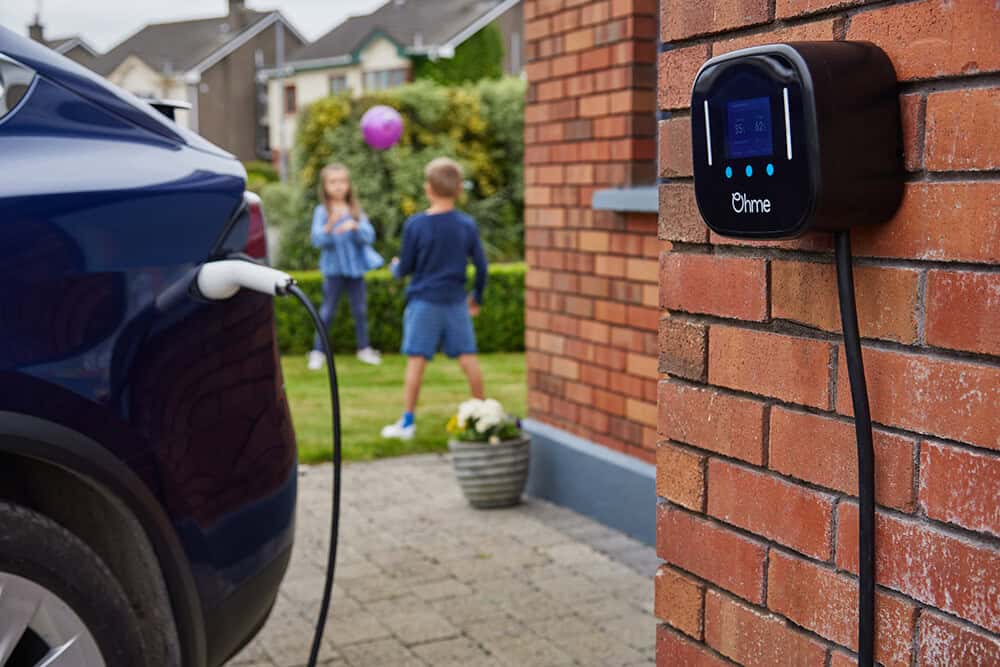
If you are considering Octopus Energy EV charging, check compatibility before buying. Intelligent Octopus Go needs a compatible EV or smart charger, a suitable smart meter and successful app integration. Octopus says its system can schedule charging when electricity is expected to be cheaper and often greener, with a regular overnight window between 11:30pm and 5:30am.
Compatibility can change, so it is sensible to check the official Intelligent Octopus Go eligibility page before making a final decision. An ordinary smart charger may still work perfectly well with a fixed off-peak tariff, but full automated control is a separate matter.
Solar owners should also consider whether they want the charger to work with their generation system. The Myenergi Zappi is designed with solar charging in mind, while the right option for you will depend on your panels, inverter, battery and energy priorities.
Step 5: Receive a fixed-price quotation
After the survey, you should receive a clear quotation that explains what is included.
At EV Power Point, our fixed-price approach is designed to avoid unpleasant surprises. The quote should account for the charger, standard installation work, cable, protective devices, testing and commissioning. If extra work is identified, it should be explained before you approve the installation.
We are a family-run team based in Redditch, with roots across Worcestershire, Warwickshire and the West Midlands. Our engineers are directly employed and manufacturer-approved; we do not subcontract installations to whoever happens to be free that week.
Once you approve the quote, we can often install your charger within as little as five days.
Step 6: Installation day
On the day, we first confirm the agreed charger position and cable route with you. It is much easier to move a proposed charger location before drilling than after.
We then safely isolate the relevant electrical supply and install the dedicated circuit. The cable is routed and secured, the charger backplate is fixed, and the unit is connected according to the manufacturer’s instructions.
For an external charger, cable entries and wall penetrations are sealed properly to help protect against moisture. We also aim to keep the work clean and tidy throughout, because “professional installation” should not mean leaving your hallway looking like a small building site.
The installation time varies according to the property and route. A straightforward home installation may take a few hours, while longer cable runs, consumer unit upgrades or groundwork will take longer.

Step 7: Test, commission and connect the app
Before we hand the charger over, we carry out electrical tests on the new circuit. These include checks such as continuity, insulation resistance, earth fault loop impedance and protective device operation.
We then commission the charger and check that it communicates correctly with the manufacturer’s app. Depending on the model, this may include:
- Connecting the charger to Wi-Fi or mobile data
- Creating or linking your user account
- Setting a charging schedule
- Adjusting the charging current where supported
- Testing start, stop and delayed charging
- Confirming tariff or solar integration
- Checking that the car begins charging correctly
This is the part where the box on the wall becomes genuinely useful technology rather than an expensive rectangle with a cable.
Step 8: Handover and paperwork
A good handover should leave you knowing how to use the charger without needing to decode a 74-page manual at midnight.
We show you the basic controls, app functions, indicator lights and charging settings. We also explain what to do if the charger loses connectivity or your charging schedule needs changing.
You should receive the relevant installation paperwork, including the Electrical Installation Certificate. The installer should also complete the appropriate building regulations and Distribution Network Operator notification requirements for the installation.
Keep these documents with your charger warranty information. They may be useful if you move home, sell the property or need future electrical work.
What if you need to spread the cost?
If paying upfront is not convenient, EV Power Point offers finance options, including a 12-month interest-free plan subject to approval. Buy now, pay later and longer-term options may also be available, depending on your circumstances.
You can read more about EV charger finance and monthly payment options. The important point is that finance should be considered after you understand the complete installation price, not used to make an unclear quote look smaller.
Your electric car charger installation checklist
| Stage | What should happen |
|---|---|
| Initial enquiry | Discuss your car, parking, charger preferences and tariff |
| Survey | Check the consumer unit, supply, earthing, cable route and charger position |
| Quote | Receive a clear fixed price with any additional work explained |
| Charger choice | Select a suitable 7kW smart charger, with compatibility checked |
| Installation | Fit the dedicated circuit, cable and charger safely and neatly |
| Testing | Complete electrical and functional tests |
| Commissioning | Connect the app, schedules, tariff and vehicle |
| Handover | Receive guidance, certificates and warranty information |
Ready to arrange your installation?
A well-planned electric car charger installation is safer, tidier and less stressful than a rushed wall-box fitting. Start by gathering a few photos of your consumer unit, meter, parking space and proposed charger location. Then speak to an installer who will give you honest advice and a proper fixed quote.
At EV Power Point, our in-house, manufacturer-approved engineers provide professional home and workplace installations across our West Midlands, Worcestershire and Warwickshire service areas. We offer fixed prices, no hidden fees and no hard sell: and we can often get you charging within five days of your approved quote.
Request your EV charger installation quote, or contact our team if you would like help choosing the right charger.